
Frequently Asked Questions: React Interview


Have you ever thought of how many people get rejected on the interviews just because they prepare for concepts and forget to focus on the actual questions that will be asked?
This article lists frequently asked interview questions for React JS. We believe that these will be useful for newbies, experienced professionals, lead developers, and testers since the questions aren’t focused on the basics, they also include more complicated things.
React basics
What is the difference between an element and a component?
An element is a simple object that describes something which should be displayed on the screen through DOM nodes or other components. Elements may include other elements in their properties. A created element does not change. The objective React Element representation looks this way:
const element = React.createElement(
'div',
{id: 'login-btn'},
'Login'
)
The mentioned above React.createElement () function returns an object:
{
type: 'div',
props: {
children: 'Login',
id: 'login-btn'
}
}
And, finally, it displays on DOM using ReactDOM.render ():
<div id='login-btn'>Login</div>
While a component can be declared in several ways. These might be method render () class, or they may be determined as a function. Anyways, it takes props as input data and returns a JSX tree as output data:
const Button = ({ onLogin }) => React.createElement(
'div',
{ id: 'login-btn', onClick: onLogin },
'Login'
)
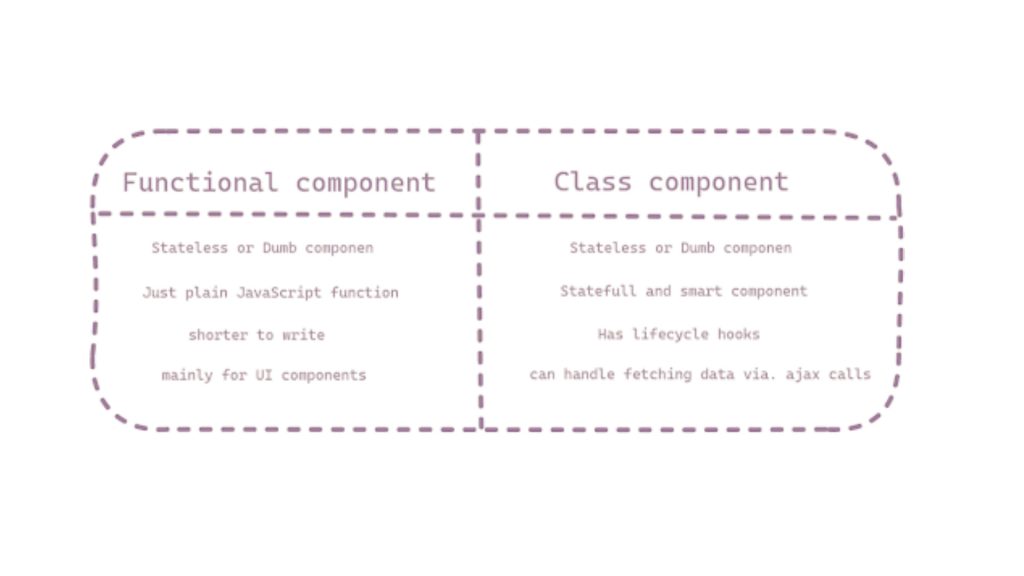
How to create components in React?
There are two possible ways of component creation:
-
1.Function components. This one is the easiest way to create a component. These are the pure JS components, that take props object as an initial parameter and return React elements:
-
nction Greeting({ message }) { return <h1>{`Hello, ${message}`}</h1> }-
2.Class components. You can also use ES6 class to determine a component. The functionality may be described like that:
-
class Greeting extends React.Component {
render() {
return <h1>{`Hello, ${this.props.message}`}</h1>  }
}
What are pure components?
-
- React.PureComponent is similar to React.Component, and the only difference is that the first one processes shouldComponentUpdate () method for you. After changing the properties or state, PureComponent will be processing the shallow comparison of both properties and state. On the other hand, components won’t be comparing the current properties and state with the next ones from the box. Thus, the component will be re-rendered by default whenever shouldComponentUpdate is processed.
-
What is a state in React?
- A component state is an object that contains some information that may change during the component’s lifecycle. The state should be as simple as possible, and the number of state components should be the least possible. Let’s create a user component with the message state:
-
class User extends React.Component {
constructor(props) {
super(props)
    this.state = {
 message: 'Welcome to React world'
}
}
 render() {
return (
<div>
<h1>{this.state.message}</h1>
</div>
)  }
}
The state is similar to properties; however, it is private and is completely controlled by the component. Namely, it is not available for any other component unless the owner-component won’t share it.
What are props in React?
Props are component inputs. These are individual values or objects containing a set of values that are passed to components when created using a naming convention similar to the attributes of HTML tags. This is the data passed from the parent component to the child component. React props aim to provide the following functionality for a component:
- Passing custom data to your component.
- Trigger state changes.
- Use with this.props.reactProp inside the component’s render () method
For example, let’s create am element with reactProp property:
<Element reactProp={'1'} />
The response pro name will become a property attached to its own object props React, which already exists in all components created using React library.
props.reactProp
What is the difference between state and props?

Both state and props are JavaScript objects. Despite they both include data that influences rendering results, they differ in their functionalities related to the components. Properties are passed to the components the same way as the function parameters are, while the state is managed inside the component, like variables that are declared in a function.
Why shouldn’t we update a state directly?
If you try to update a state directly, it won’t be displaying the component.
//Wrong
this.state.message = 'Hello world'
Use setState () method instead of that. It plans the component object state updates. When the state changes, the component responds with the re-rendering.
Note: You can assign the state to the object directly either in the constructor or with the last syntax of the JavaScript class field declaration.
What is the purpose of a callback function as an argument to setState ()?
The callback function is called when setState is finished and the component is rendering. Since setState () is asynchronous, the callback function is used for any publication action.
Note: It is highly recommended that you use a lifecycle method rather than this callback function.
setState({ name: 'John' }, () => console.log('The name has updated and component re-rendered'))
How do HTML and React event handling differ?
A few differences are listed below:
-
1.In HTML, the event name is usually displayed in lowercase as a convention:
-
<button onClick={activateLasers}>While in React it follows camelCase:
<button onClick={activateLasers}>
2.You are able to return false to avoid default behavior:
<a href='#' onclick='console.log("The link was clicked."); return false;' />
While in React you must call preventDefault ():
function handleClick(event) { event.preventDefault() console.log('The link was clicked.')}
3.In HTML, you need to call the function by adding (), while in React, you shouldn’t add () with the function name. (see, for example, the “activateLasers” function in the first point).
How to bind methods or event handlers in JSX callbacks?
You can reach this in three different ways:
Constructor Binding: In JavaScript classes, methods are not bound by default; same as React event handlers that are defined as class methods. We usually bind them in the constructor:
class Foo extends Component {
constructor(props) {
super(props);
this.handleClick = this.handleClick.bind(this);
}  handleClick() {
console.log('Click happened');
}  render() {
return <button onClick={this.handleClick}>Click Me</button>;
}
}
Public class field syntax: If you don’t like using the binding approach, you can use the public class field syntax to bind callbacks correctly:
handleClick = () => {
console.log('this is:', this)
}

<button onClick={this.handleClick}>
{'Click me'}
</button>
Arrow functions in callbacks. You can use arrow functions directly in callbacks:
handleClick() {
console.log('Click happened');
}
render() {
return <button onClick={() => this.handleClick()}>Click Me</button>;
}
Note: In case the callback is passed to child components as a prop, those components can perform additional re-rendering. In such cases, for performance reasons, it is recommended to use the syntax .bind () or public fields of the class.
What are synthetic events in React?
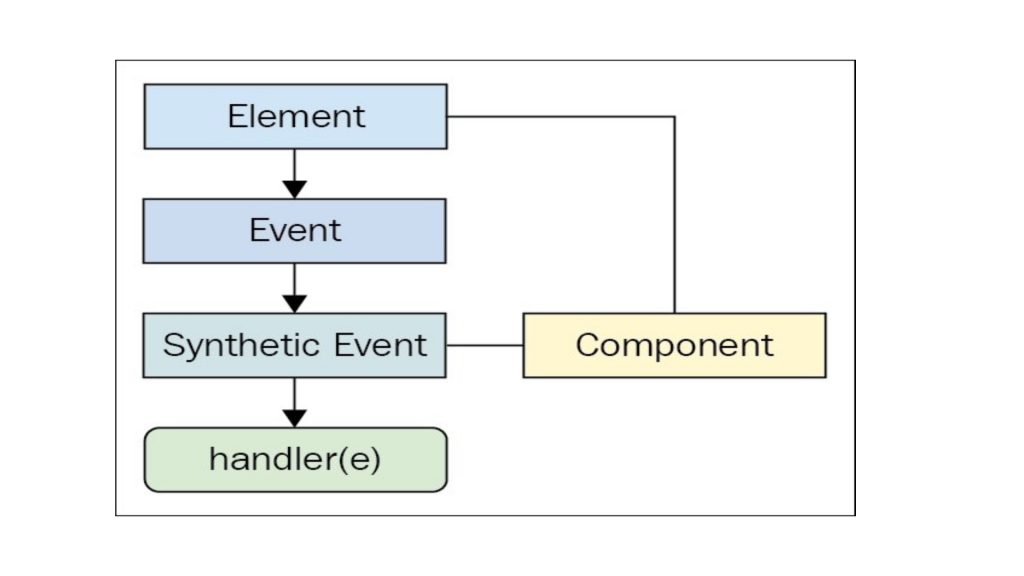
SyntheticEvent is a cross-browser wrapper for a native browser event. Its API is the same as the native browser event, including stopPropagation () and preventDefault (), except that events work the same in all browsers.
What is the “key” property and what’s the advantage of using it for arrays of elements?
Key is a special string attribute that should be included while creating arrays of elements. Keyprop helps React detect what elements have been edited, added, or deleted. We mostly use the IDs from our data as a key:
const todoItems = todos.map((todo) =>
<li key={todo.id}>
{todo.text}
</li> )
If you don’t have stable IDs for the displayed elements, you can use itemindex as the key.
What is Lifting State Up in React?
When several components must share the same changing data, it is a good idea to raise the shared state to their closest common ancestor. Namely, if two child components are using the same data from their parent component, then move the state to the parent instead of keeping the local state in both child components.
What are the component’s lifecycle phases?
A component’s lifecycle consists of three distinct lifecycle stages:
-
Mounting: a component is ready to be mounted in the browser DOM. This phase covers initialization from the lifecycle methods constructor (), getDerivedStateFromProps (), render (), and componentDidMount ().
-
Updating: At this point, the component is updated in two ways, sending new props and updating the state from either setState () or forceUpdate (). This step covers the lifecycle methods getDerivedStateFromProps (), shouldComponentUpdate (), render (), getSnapshotBeforeUpdate (), and componentDidUpdate ().
-
Unmounting: In this last step, the component is not required and is detached from the browser DOM. This stage includes the componentWillUnmount () lifecycle method.
It’s worth mentioning that React internally has the concept of phases when applying changes to the DOM. They are divided in the following way:
-
Visualization. The component will be displayed with no side effects. This works with Pure components, and at this point, React can pause, interrupt, or restart rendering.
-
Preliminary fixation. Before the component actually applies the changes to the DOM, there is a point that allows React to read from the DOM via getSnapshotBeforeUpdate ().
-
Commit. React works with the DOM and does final lifecycles, respectively, componentDidMount () for mounting, componentDidUpdate () for updating, and componentWillUnmount () for unmounting.
-
What are portals in React?
Portals are the recommended ways to render child elements in a DOM node, which exists outside of the parent component’s DOM hierarchy.
ReactDOM.createPortal(child, container)
The first argument (child) is any renderable React child, such as an element, string, or fragment. The second argument (container) is a DOM element.
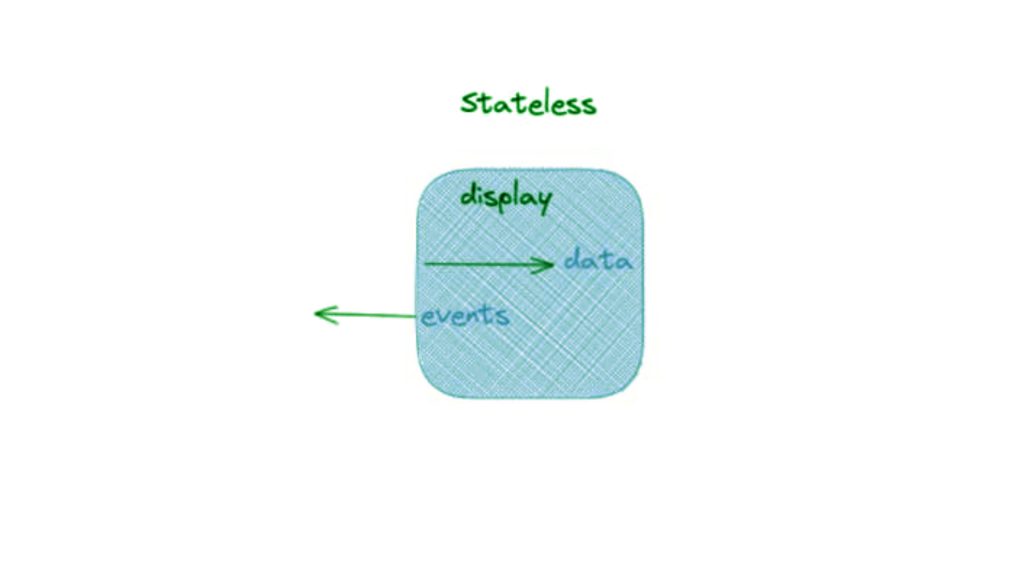
What are stateless components?
If the behavior is independent of its state, then it might be a stateless component. You can use a function or class to create stateless components. There are many benefits of using functional components: these are easy to write, understand and test, a bit faster, and the keyword may be avoided.
What happens if props are used in the original state?
If the properties of a component change without updating the component, the new property value will never be displayed because the constructor function will never update the current state of the component. The initialization of the state from the props is performed only when the component is first created. The component below will not display the updated input value:
class MyComponent extends React.Component {
constructor(props) {
super(props)
this.state = {
records: [],
inputValue: this.props.inputValue
};
}
render() {
return <div>{this.state.inputValue}</div>
}
}
Using props inside a render method will update the value:
class MyComponent extends React.Component {
constructor(props) {
super(props)
    this.state = {
record: []
}
}
  render() {
return <div>{this.props.inputValue}</div>
}
}
React Router
What is the purpose of the push () and replace () history methods?
The log instance has two methods for navigation purposes
If you think of history as an array of visited locations, push () will add the new location to the array, and replace () will replace the current location in the array with the new one.
How to navigate programmatically using React Router?
There are three different ways to achieve programmatic navigation within components.
Using the higher-order function withRouter (): The higher-order function withRouter () will inject the history object like a pillar of the component. This object provides push () and replace () methods to avoid using context.
import { withRouter } from 'react-router-dom' // this also works with 'react-router-native'

const Button = withRouter(({ history }) => (
<button
type='button'
onClick={() => { history.push('/new-location') }}  >
{'Click Me!'}  </button> ))
Using the Component Properties and Rendering Pattern: The component passes the same properties as withRouter (), so you will be able to access the history methods through the history’s property.
import { Route } from 'react-router-dom'

const Button = () => (
<Route render={({ history }) => (
<button
type='button'
onClick={() => { history.push('/new-location') }}
>
{'Click Me!'}
</button>   )} /> )
Using context: This option is not recommended and is considered an unstable API.
const Button = (props, context) => (
<button
type='button'
onClick={() => {
context.history.push('/new-location')    }} >
{'Click Me!'}  </button> )
Button.contextTypes = {
history: React.PropTypes.shape({
push: React.PropTypes.func.isRequired  })
}
How to get request parameters in React Router v4?
The ability to parse query strings has been dropped from React Router v4 because over the years there have been requests from users to support various implementations. Thus, the users were given the decision to choose the implementation they like. The recommended approach is to use a query string library.
const queryString = require('query-string');
const parsed = queryString.parse(props.location.search);
You can also use URLSearchParams if you want something “native”:
const params = new URLSearchParams(props.location.search)
const foo = params.get('name')
You must use apply fill for IE11.
React Redux
What are Redux selectors and why these should be used?
Selectors are functions that take Redux state as an argument and return some data to pass to the component. For example, to get data about a user from a state:
const getUserData = state => state.user.data
These selectors have two main advantages:
The selector can compute derived data, allowing Redux to keep its state as low as possible.
The selector won’t be recalculated until one of its arguments is changed.
How can mapDispatchToProps () be written?
There are several ways to bind action creators to dispatch () in mapDispatchToProps (). The following are the possible options:
const mapDispatchToProps = (dispatch) => ({
action: () => dispatch(action())
})
const mapDispatchToProps = (dispatch) => ({ action: bindActionCreators(actioimport { ADD_TODO } from './actionTypes'
export default (state = [], action) => {
switch (action.type) {
case ADD_TODO:
return [
...state,
{
text: action.text,
completed: false
}
];
default:
 return state
}
}
n, dispatch)
})
const mapDispatchToProps = { action }
The latest option is just a reduction of the first one.
What is the difference between component and container in React Redux?
A component is a class or functional component that describes the presentation portion of your application. A container is an informal term for a component that is connected to a Redux store. Containers follow Redux state updates and dispatch actions, and they usually don’t render DOM elements; they delegate rendering to presentation child components.
What is the mental model of the redux-saga?
Saga is like a separate thread in your application that is solely responsible for side effects. redux-saga is redux middleware, which means that this thread can be started, paused, and canceled from the main application using normal Redux actions, it has access to the complete state of the Redux application, and it can also dispatch Redux actions.
What is the difference between call () and put () in redux-saga?
Both call () and put () are functions for creating effects. The call () function is used to create an effect description that instructs the middleware to invoke the promise. The put () function creates an effect that tells the middleware to send an action to the store. Let’s take a look at an example of how these effects work for fetching specific user data:
function* fetchUserSaga(action) {  // `call` function accepts rest arguments, which will be passed to `api.fetchUser` function.  // Instructing middleware to call promise, it resolved value will be assigned to `userData` variable  const userData = yield call(api.fetchUser, action.userId)
2  // Instructing middleware to dispatch corresponding action.  yield put({
3type: 'FETCH_USER_SUCCESS',
4userData  })
5}
What is Redux Thunk?
The Redux Thunk middleware allows you to write action creators that return a function instead of an action. A transformer can be used to delay the dispatch of the action or to send only when a certain condition is met. The inner function receives the dispatch () and getState () repository methods as parameters.
What is a comparison algorithm?
React has to use algorithms to learn how to efficiently update the UI so it matches the most recent tree. The comparison algorithm generates the minimum number of operations to transform one tree into another. However, the algorithms have a complexity of the order of O (n3), where n is the number of elements in the tree. In this case, it would take one billion comparisons to display 1000 items. It’s too expensive. Instead, React implements an O (n) heuristic based on two assumptions:
- Two elements of different types will give different trees.
- The developer can suggest which child elements can be stable across different renders using the key property.
Does the property have to be named by the renderer to render the props?
Despite the template being named render props, you don’t have to use the property named render to use this template. those. Namely, any prop, which is a function that a component uses to know what to render, is technically a “rendering prop”. Let’s take an example with child support for rendering:
<Mouse>  {mouse => (
<p>The mouse position is {mouse.x}, {mouse.y}</p>
)}</Mouse>children={mouse => (
<p>The mouse position is {mouse.x}, {mouse.y}</p> )}/>
In fact, the child prop does not have to be listed in the “attributes” list on the JSX element. Instead, you can store it directly inside the element:
<<Mouse>  {mouse => (
<p>The mouse position is {mouse.x}, {mouse.y}</p>
)}</Mouse>
When using this technique (nameless), explicitly specify that the children should be a function in your propTypes:
Mouse.propTypes = {
children: PropTypes.func.isRequired
};
What problems may be faced when using rendering with pure components?
If you create a function inside a render method it negates the purpose of a pure component since comparing small properties will always return false for new properties, and every render, in such a case, will generate a new value for the render property. You can solve this problem by defining the render function as an instance method.

How to create a higher-order component (HOC) using rendering?
You can implement most of the HOCs by using a regular render-backed component. For instance, if you prefer to use a HOC WithMouse instead of a component, you can easily create one using a regular with a render prop.
function withMouse(Component) {  return class extends React.Component {
render() {
return (
<Mouse render={mouse => (
<Component {...this.props} mouse={mouse} />
)}/>
);
}
}
}
This way of rendering props makes it possible to use any of the templates.
What is windowing?
Windowing is a technique that only displays a small subset of your strings at any given time and can dramatically reduce the time it takes to re-render components as well as the number of DOM nodes generated. If your application displays long lists of data, this method is recommended. Both react-window and react-virtualized are popular window libraries that provide several reusable components for displaying lists, grids, and tabular data.
What is the typical use case for portals?
React portals are very useful when the parent component has overflowed: hidden or properties that affect the stacking context (z-index, position, opacity, and other styles), and you have to visually “break out” of its container.
For instance, dialog boxes, global message notifications, and tooltips.
How to set a default value for an uncontrolled component?
In React, the value attribute on form elements overrides the value in the DOM. With an uncontrolled component, you might want React to provide an initial value, but not control subsequent updates. To deal with this case, you can specify the defaultValue attribute instead of value.
render() {
return (
<form onSubmit={this.handleSubmit}>
<label>
User Name:
<input
defaultValue="John"
type="text"
ref={this.input} />
</label>
<input type="submit" value="Submit" />
</form>
);
}
The same approach may be applied for selection input and text area; however, you must use the default Checked for the checkbox and radio inputs.
